Mastering No-Bake Banana Split Cake: Tips for Perfect Slices & Make-Ahead
The humble banana split, a classic American ice cream parlor creation, has delighted generations since its invention in 1904. It’s a nostalgic symphony of sweet bananas, creamy ice cream, rich sauces, and whipped cream. But what if you could capture all that iconic flavor in a convenient, no-melt dessert perfect for any gathering? Enter the no-bake banana split cake – a chilled, layered marvel that transforms a beloved sundae into a stunning, crowd-plepleasing dessert. This article will guide you through crafting your own magnificent *frozen banana split cake*, offering expert tips for flawless layers, make-ahead convenience, and achieving those coveted, picture-perfect slices every time.The Irresistible Allure of the Chilled Banana Split Cake
Imagine the joy of a banana split without the frantic race against melting ice cream. That's the core appeal of this magnificent dessert. Far more than just a simple treat, the no-bake banana split cake is a showstopper, towering high with vibrant layers and tantalizing textures. It’s a testament to childhood indulgence and the joyful memories of summer, making it the ultimate sweet delight for warm days, summer parties, potlucks, or simply a family celebration. What makes this layered cake so special? It's the delightful interplay of:- Crunchy Crust: A buttery graham cracker base provides the perfect foundation.
- Creamy Cheesecake: A rich, tangy no-bake cheesecake layer that melts in your mouth.
- Fresh Fruit: Sliced bananas and crushed pineapple add a burst of tropical freshness.
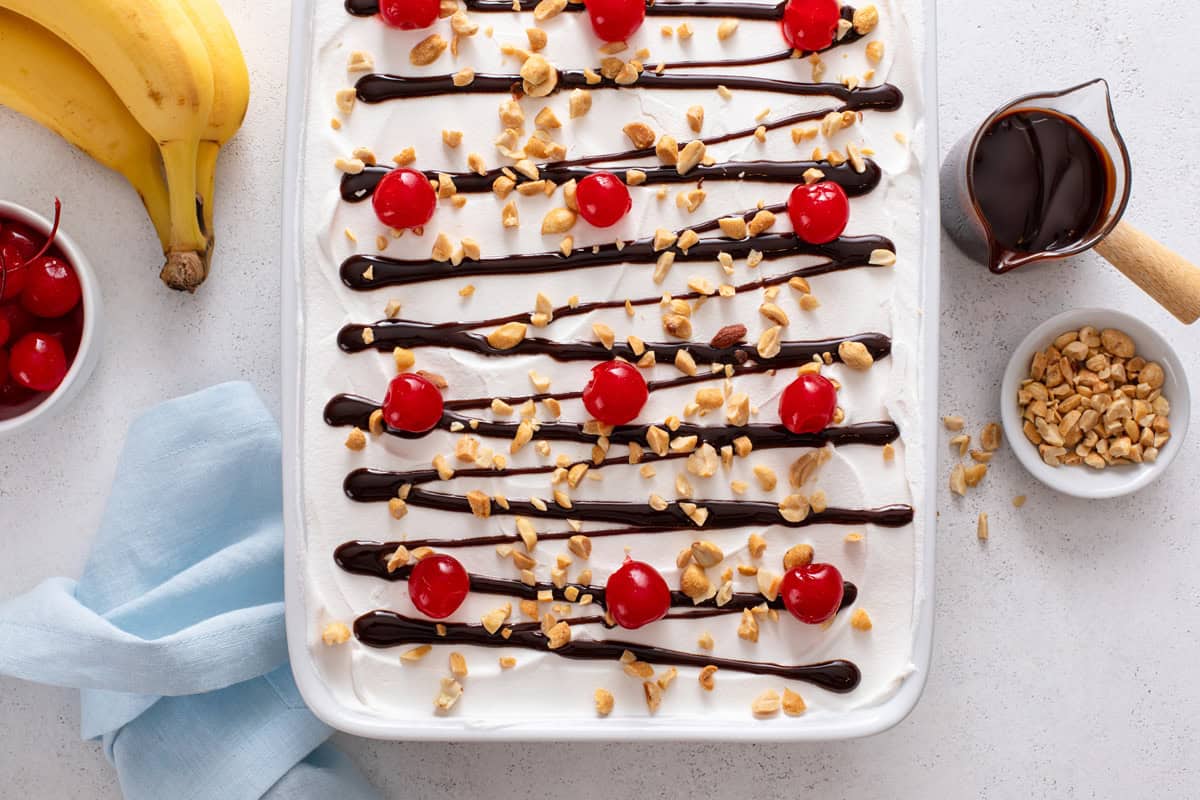
- Silky Topping: A generous blanket of whipped topping or homemade whipped cream.
- Decadent Drizzle: Hot fudge that weaves through the layers.
- Fun Garnishes: Nuts, sprinkles, cherries, and more, adding visual appeal and extra texture.
Crafting Your Perfect Frozen Banana Split Cake: Layer by Layer Excellence
Creating this masterpiece is surprisingly straightforward, but attention to detail ensures a truly spectacular outcome. The majority of the preparation time involves waiting for the layers to properly chill and firm up – a critical step for a stable and sliceable *frozen banana split cake*.The Foundation: Graham Cracker Crust
Begin with your crust. Combine finely crushed graham crackers with melted butter and a touch of sugar. Press this mixture firmly into the bottom of a 9x13-inch pan. Ensure an even thickness across the base and slightly up the sides. Once pressed, refrigerate it for at least 30 minutes to allow the butter to firm up, creating a solid base for your subsequent layers.
The Heart: No-Bake Cheesecake Filling
Next comes the luscious no-bake cheesecake layer. This typically involves cream cheese, powdered sugar, and sometimes a bit of whipped topping or heavy cream to achieve that light, airy texture. Spread this evenly over your chilled crust. For an extra touch of flavor, consider adding a hint of vanilla extract or a tiny squeeze of lemon zest to brighten the cream cheese mixture.
The Freshness: Fruit Layers
- Bananas: Slice fresh, ripe bananas uniformly. Arrange them in a single layer over the cheesecake. While delicious, bananas can brown quickly. The good news is that the acid from the pineapple layer will help slow down this discoloration process significantly.
- Pineapple: Use canned crushed pineapple, but here's a crucial tip: drain it exceptionally well. Excess moisture can make your cake soggy. Press out as much liquid as possible before gently spreading it over the bananas. For a tropical twist, some recipes also incorporate sliced strawberries or other berries alongside the pineapple.
The Cloud: Whipped Topping
A generous layer of whipped topping is next. You have options here:
- Store-bought Whipped Topping: This is the easiest and most common choice, known for its stability.
- Homemade Whipped Cream: For a richer flavor, whip your own heavy cream with sugar and a touch of vanilla. If opting for homemade, consider adding a stabilizer like a touch of unflavored gelatin or a pinch of cream of tartar to prevent it from deflating.
- Avoid: Absolutely steer clear of aerosol whipped cream; it will quickly collapse and make your cake watery.
The Grand Finale: Decadent Toppings
This is where you truly make it your own! Drizzle hot fudge generously over the whipped topping. Add your favorite sundae fixings: chopped pecans or walnuts, colorful sprinkles, mini chocolate chips, toffee bits, or even a swirl of caramel sauce. The iconic maraschino cherry (or several!) is the crowning glory. Once decorated, the hardest part begins: waiting for the cake to chill thoroughly, allowing all layers to set properly. This chilling process is what makes it a firm, delightful *frozen banana split cake* when ready to serve.
The Make-Ahead Advantage and Storage Secrets
One of the greatest benefits of this no-bake dessert is its make-ahead convenience. Preparing it hours in advance frees you up to enjoy your guests when it's time to serve.Optimal Serving Time: While the cake is best served within 12-24 hours of assembly for peak freshness and appearance, thanks to the pineapple's acidity helping to preserve the bananas, it can certainly be enjoyed beyond that window. Over time, bananas can soften and slightly discolor, though they remain perfectly edible.
Refrigeration: Always store your banana split cake tightly covered in the refrigerator. This protects it from absorbing other food odors and keeps the layers firm.
Freezing for Longer Storage: If you want to make your *frozen banana split cake* even further in advance, or save leftovers, you can freeze it. Wrap the entire cake (or individual slices) very well in plastic wrap, then a layer of aluminum foil, to prevent freezer burn. It can be stored in the freezer for up to 2-3 weeks. When ready to serve, transfer it to the refrigerator to thaw for a few hours until it reaches a sliceable, yet still firm and chilled, consistency. Be aware that the texture of the whipped topping and bananas might change slightly after extended freezing and thawing, becoming a bit softer.
Mastering the Art of Slicing: Picture-Perfect Portions
Achieving neat, clean slices of a layered dessert can sometimes be a challenge, but with a few simple tricks, your *frozen banana split cake* will look professionally prepared. This is crucial for a dessert that’s as visually appealing as it is delicious. For tips on making your layered cake truly stand out, see our article on Showstopping Layered Banana Split Cake: No Melt Dessert Perfection.Here are the secrets to perfect slicing:
- The Pre-Slice Freeze: This is arguably the most important tip. About 30 minutes before you plan to slice and serve, place your chilled cake in the freezer. This brief freezing period will firm up all the layers even further, making them more stable and less likely to squish or slide when cut. This step is a game-changer for achieving crisp edges.
- The Right Knife: Use a sharp, thin-bladed knife. A long chef's knife or even a thin carving knife works well.
- Clean Cuts Every Time: The most common mistake is not cleaning the knife between cuts. Layers will inevitably stick to the blade and smear the next slice. To prevent this, keep a paper towel handy and wipe your knife clean after each slice. For an even cleaner cut, especially through sticky fudge, you can run your knife under hot water, wipe it dry, and then make your cut. The warmth helps glide through the layers.
- Smooth Edges: If you're aiming for truly picture-perfect slices, a small offset spatula can be your best friend. After making a cut, gently run the offset spatula along the cut sides of each slice to smooth out any imperfections or smudged layers.
- Serving with Care: Use a sturdy pie server or wide spatula to lift the slices carefully from the pan to the plate, ensuring they maintain their integrity.
